support@registrationkraft.com


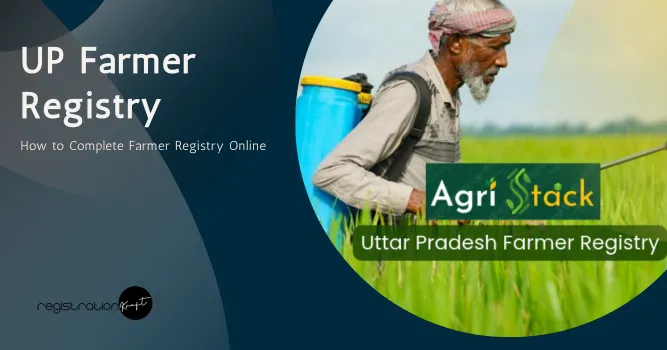

Farmer Registry is a digital database developed under the Government of India’s AgriStack initiative, which is part of the Digital Agriculture Mission. It provides farmers with a unique digital identity known as a Farmer ID, linked to their personal details and digitised land records.
The registry helps establish a verified digital identity for farmers and makes it easier for government authorities to identify eligible beneficiaries and deliver agricultural schemes and services efficiently. It also supports the integration of farmer-related information, including landholdings, crops cultivated and other relevant agricultural details.
If you are a farmer receiving benefits under the PM Kisan Samman Nidhi Yojana or need to purchase fertilizers and seeds, completing the Farmer Registry has become necessary.
Key Benefits of Agristack Farmer Registry
- Easy Access to Government Schemes: Helps integrate farmers with government schemes, including PM Kisan Samman Nidhi Yojana.
- Digital Farmer Identity: Provides farmers with a unique Farmer ID for digital identification and authentication.
- Agricultural Credit Facilities: Supports access to agricultural credit and schemes such as Kisan Credit Card (KCC).
- Crop Insurance Benefits: Facilitates integration with crop insurance schemes, including Pradhan Mantri Fasal Bima Yojana (PMFBY).
- MSP-Based Procurement: Helps integrate verified farmer information with Minimum Support Price (MSP)-based procurement systems.
- Fertilizer and Agricultural Input Distribution: Supports better management and delivery of agricultural inputs to farmers.
- Disaster Relief Assistance: Helps government authorities identify farmers and facilitate disaster-related assistance.
- Transparent Service Delivery: Helps improve the efficiency, transparency and delivery of government agricultural services.
UP Farmer Registry Online Process
Farmers can complete the registration process themselves online using a mobile phone or computer.
1. Open the Farmer Registry Portal
Visit the official UP Farmer Registry website ( https://agridarshan.up.gov.in/) and click on Farmer Registry under services section. You will be redirect to another portal i.e https://upfr.agristack.gov.in/farmer-registry-up/#/
2. Create an Account: New User Registration
To register, open the login section and select the Farmer option.
Since you are registering for the first time, you need to create a new account.
Follow these steps:
- Click on the Create New User Account option.
- Enter your Aadhaar number.
- Click on Submit.
- An OTP will be sent to the mobile number linked to your Aadhaar card.
- Enter the OTP and click on Verify.
After verification, your Aadhaar details will automatically appear on the portal.
Next, enter your mobile number. An OTP will be sent to the mobile number you have entered. Enter the OTP and click on Verify to complete mobile number verification.
3. Create a Password and Log In
After verifying your mobile number, you need to create a password.
- Create a password of at least eight characters.
- Re-enter the password in the Confirm Password section.
- Click on Create My Account.
Your account will now be created successfully.
To log in:
- Enter your registered mobile number.
- Enter your password.
- Fill in the captcha code displayed on the screen.
- Click on the Login tab.
You will now be logged in to the Farmer Registry portal.
After logging in, you will see a green button labelled Register as Farmer. Click on this option to proceed with farmer registration.
If the portal asks whether you want to change your mobile number, you can select the appropriate option.
4. Fill in Farmer Details
In the next step, your name will automatically appear based on your Aadhaar details.
If your name is not available in the regional language, you need to enter it manually. You can use the Google Hindi Input Tool to type your name in Hindi.
You can also enter your Gmail ID if it is not already available.
Next, select your social category from the available options:
- SC
- ST
- OBC
- General
After selecting your category, enter your father’s name in the regional language.
Your photograph and address will also appear on the screen. These details are fetched from your Aadhaar card.
5. Fill in Residential Details
Check the address displayed on the portal.
If your address is incorrect or you want to update it with your latest residential details, click on the Insert Latest Residence Details option.
You can enter your updated address according to your requirements.
However, the state cannot be changed. You can update other details, such as:
- District
- Tehsil
- Village
- PIN Code
There is also an option to enter your address in the regional language. You can enter your address in Hindi.
Next, you will see the Land Ownership Details section.
If you own the land, select the Owner option.
Under Occupation Details, select the relevant occupation. In this example, select both:
- Land Owning Farmer
- Agriculture
This indicates that the farmer owns the land and also carries out agricultural activities on it.
6. Add Land Details (Khatauni)
The next step is to add your agricultural land details.
Click on the Fetch Land Details option. A popup will appear asking you to select the location of your land.
Select the details according to your Khatauni (land record), including:
- District
- Tehsil
- Village
After selecting these details, additional fields will appear.
You will be asked to enter your Gata Number (Survey Number) and Sub-Survey Number.
The Sub-Survey Number is available in the latest downloaded Khatauni. If you have it, enter the number in the relevant field.
After entering the survey details, click on Submit. The land information will be fetched and displayed on the portal.
Sometimes, farmers may encounter an error asking them to enter the Sub-Survey Number. If you know your Sub-Survey Number, check your Khatauni and enter it.
If you do not have the Sub-Survey Number, you can try entering the Survey Number again in that field. According to the process demonstrated, this may allow the land information to be fetched.
After fetching the details, the names of the landowners will appear on the screen.
Select the name of the farmer whose registration you are completing.
You may also see an option called My Name Is Not There in the List of Owners. This option is intended for farmers whose names are present in the Khatauni but are not appearing in the list, including cases where the name is recorded in an order.
This option allows manual entry of details. However, the Khatauni generally needs to be corrected first so that the relevant details can be reflected on the portal.
After selecting your name, all the related land records will appear.
Select each record associated with your name. If the land is held in a joint account (Mustarka Khata), the names of multiple owners may appear. Select the records associated with your name.
Finally, click on Submit.
Your selected land details will now be added to the registration.
If you have more than one Khatauni, you should add all your land records.
To do this, click on Fetch Land Details again and repeat the process for each location where you own land.
Once all the land details have been added, click on Verify All Land.
The portal will select all the added land records and display the total number of Gata Numbers and the total land area held by the farmer.
7. Social Registry Details
After adding your land details, you will see the Social Registry Details section.
If you have a ration card or Family ID card, enter the relevant details in this section.
However, registration can still be completed even if the farmer does not have a ration card or Family ID card.
Next, go to the Department Approval section and select the Revenue option.
The farmer must also accept the consent declaration confirming that all the information provided is correct and that no information has been concealed.
After completing these details, click on the Update option.
8. e-Sign Process Step by Step
After clicking on Update, a popup will appear asking you to enter an OTP.
This OTP will be sent to the mobile number linked to your Aadhaar card.
Enter the OTP and click on Verify. After verification, click on Submit.
The next step is the e-Sign process.
Previously, farmers had to fill out a physical form and submit it. However, through e-Sign, documents can now be submitted digitally without sending physical documents anywhere.
For the e-Sign process, a new portal will open.
Follow these steps:
- Enter your Aadhaar number.
- Select either the T-OTP or OTP option.
- If you use the Aadhaar mobile application, T-OTP may be a better option.
- Otherwise, select OTP and click on Generate OTP.
- An OTP will be sent to your mobile phone.
- Enter the OTP.
- Accept the consent declaration.
- Click on Submit.
Your e-Sign process will now be completed.
9. Final Submission and Farmer Enrollment ID
After clicking on Submit, your Farmer Registry registration will be completed. A Farmer ID will be generated, and you will receive your Farmer Enrollment ID. Make sure to save this Enrollment ID for future reference. You will also find a Download PDF option. Click on it to download and save a copy of your Farmer Registry application. Your registration process is now complete from your side.
However, the Farmer Registry document contains verified land information. After you submit your registration, the government will review the information provided to check whether all the details are correct.
Once the verification process is completed, you will be able to download your verified Farmer Registry certificate.
How to Check Farmer ID Status
After completing the registration, you can check your application status through the portal. Click on the Status option to see the current status of your enrollment.Immediately after registration, the status may appear as Pending because the application has just been submitted.
The verification process generally takes around 5 to 7 days, depending on the workload at the concerned office. The time may also vary from state to state. Some states may complete the verification faster, while others may take longer.
Once your Enrollment ID is generated, you will subsequently receive a Center ID.
Through this system, the government determines how much fertilizer, including Urea and DAP, should be provided to each farmer.
Therefore, completing the Farmer Registry has become very important. Going forward, farmers will also need to have a Farmer Registry to receive benefits under the PM Kisan Samman Nidhi Yojana.
Conclusion
Farmers can complete their Farmer Registry online using a mobile phone or computer by following the steps explained above.
The process includes creating an account, verifying Aadhaar and mobile number details, entering personal and residential information, adding land records through Khatauni, completing social registry details, and submitting the application through e-Sign.
After successful submission, farmers receive an Enrollment ID, which should be saved for future reference. The government subsequently reviews the submitted information, and farmers can download their verified certificate once the verification is complete.